When you hear the term “rapid prototyping” know that it doesn’t only involve physical fabrication of prototypes, as it also relies on 3D printing for other engineering activity like modifications and designs.
Rapid prototyping is gaining more popularity now because manufacturers are looking to speed up their production process while cutting down costs as well.
What is Rapid Prototyping?

Rapid prototyping is a group of techniques used to quickly create a scale model of a part or assembly using three-dimensional computer-aided design (CAD) data. This process allows for quick iterations and refinements, ensuring that the final product closely matches the initial design intent. It is essential for efficient product development and testing.
How Does Rapid Prototyping Work?
Rapid prototyping involves several key steps, each integral to creating accurate and functional prototypes:
- Conceptualization
The rapid prototyping process begins with the conceptualization phase. This stage involves developing the initial idea and sketching out the design. This initial concept is then refined through discussions and brainstorming sessions to ensure it meets the project requirements.
- CAD Modeling
Once the concept is finalized, it is converted into a 3D digital model using computer-aided design (CAD) software. This step is crucial as it creates a precise representation of the design that can be manipulated and tested digitally before physical production.
- Conversion to STL
The CAD model is then converted into an STL file, which is the standard format used by 3D printers. This file format represents the surface geometry of the model as a series of triangles, allowing the printer to understand and replicate the design.
- Slicing
The STL file is sliced into thin layers using slicing software. Each layer is a cross-sectional representation of the model that the 3D printer will build upon sequentially. This step ensures that the printer can accurately reproduce the complex geometries of the design.
- 3D Printing
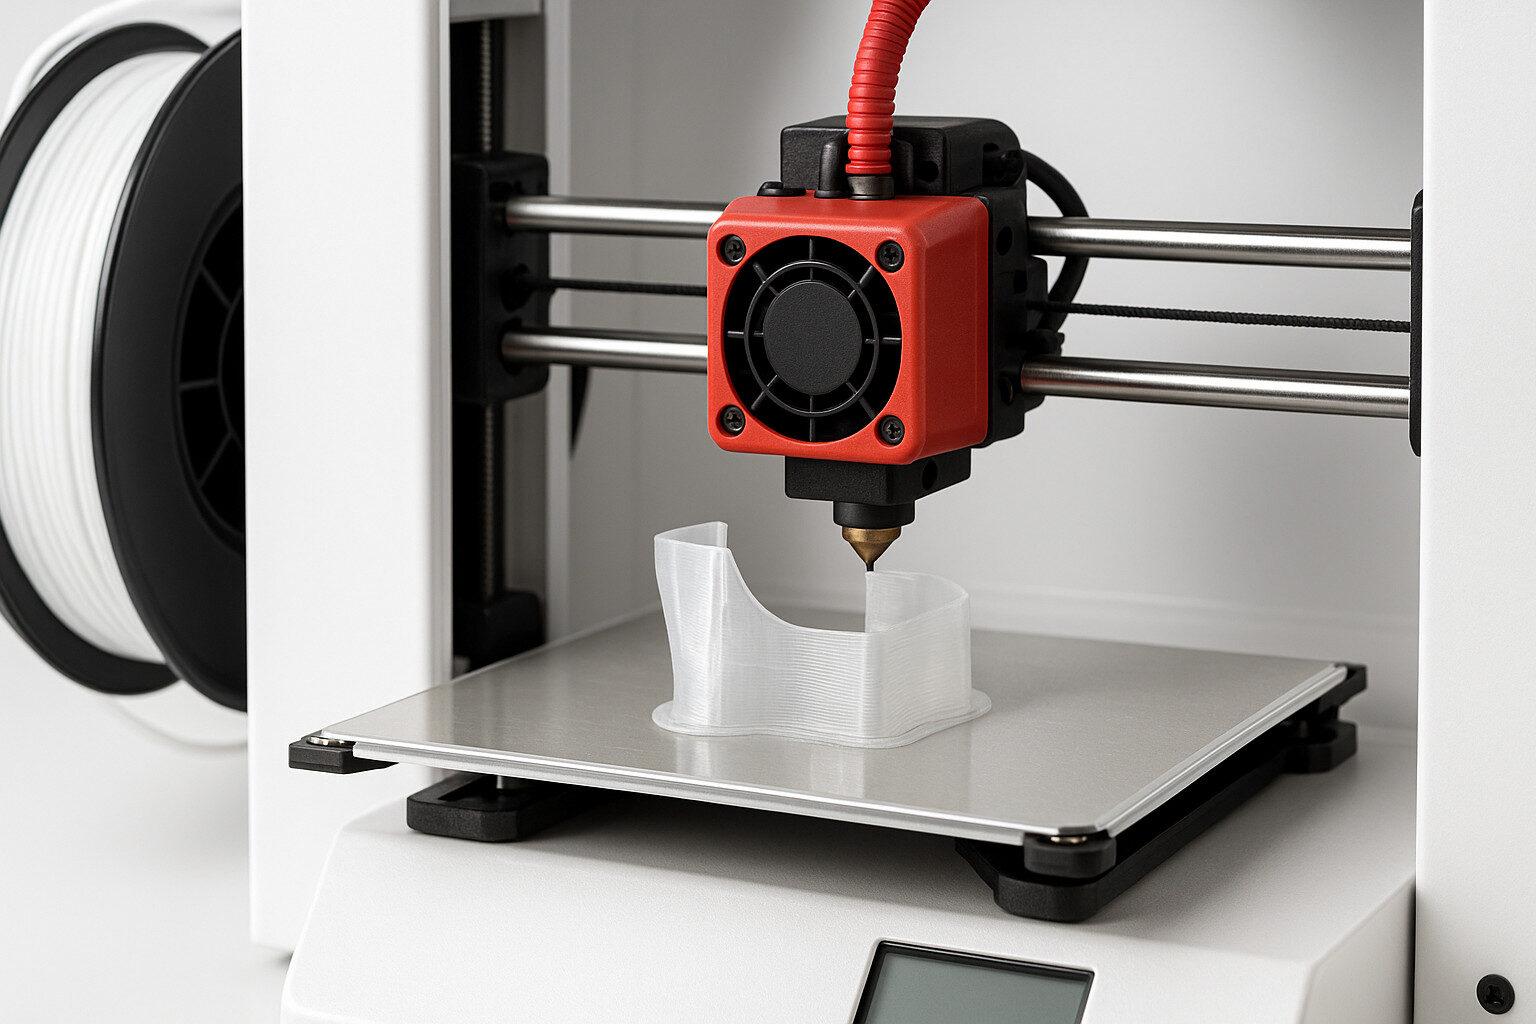
During the 3D printing stage, the printer creates the physical prototype by adding material layer by layer according to the sliced data. 3D printing for rapid prototyping is particularly useful because it allows for the creation of functional prototypes quickly and with high precision.
- Post-Processing
After printing, the prototype may require post-processing to achieve the desired finish and functionality. This can include removing support structures, sanding rough edges, and applying paint or other finishes.
- Testing and Evaluation
The final step is testing and evaluating the prototype. This involves assessing its functionality, fit, and overall design accuracy. Any issues identified during this phase can be addressed by revising the CAD model and repeating the process.
How Does Rapid Prototyping Work?
Rapid prototyping is a process that quickly creates physical models from digital designs. This method is essential in modern manufacturing processes as it allows for quick iterations and refinements, significantly reducing the time and cost associated with product development. The following are the main steps involved in a rapid prototyping project:
- Conceptualization:
- Develop the initial idea and design.
- Use computer-aided design (CAD) software to create a detailed digital model.
- Conversion to STL:
- Convert the CAD model into an STL file format, which represents the surface geometry of the model with a series of triangles.
- This format is essential for most 3D printers.
- Slicing:
- Use slicing software to divide the STL file into thin layers.
- These layers provide a step-by-step guide for the 3D printer to follow.
- 3D Printing:
- 3D printing is the core of the rapid prototyping process. It builds the physical model layer by layer from the sliced data.
- Technologies such as fused deposition modeling (FDM), stereolithography (SLA), and selective laser sintering (SLS) are commonly used.
- Post-Processing:
- Once printed, the prototype often requires post-processing to achieve the desired finish and functionality.
- This can include removing support structures, sanding, and applying surface treatments.
- Testing and Evaluation:
- Evaluate the prototype for functionality, fit, and design accuracy.
- This step is crucial for identifying any design flaws and making necessary adjustments.
How is 3D Printing Being Used for Rapid Prototyping?

3D printing has revolutionized the rapid prototyping process by offering a versatile and cost-effective method to produce functional prototypes.
Here are some ways 3D printing is being utilized:
- Creating Functional Prototypes:
- 3D printing enables the production of functional prototypes that closely mimic the final product’s properties and performance.
- This is crucial for physical validation and testing before mass production.
- Reducing Prototyping Costs:
- Traditional methods like injection molding can be expensive, especially for small batches.
- 3D printing reduces costs by eliminating the need for expensive tooling and allowing for the use of different materials suitable for various applications.
- Accelerating Time to Market:
- The rapid prototyping enabled by 3D printing allows for faster development cycles.
- Products can be brought to market more quickly, giving businesses a competitive edge.
- Supporting Design Iteration:
- The ability to create multiple iterations quickly and efficiently is one of the main advantages of 3D printing.
- Designers can test various designs and make necessary adjustments in a short time frame.
- Facilitating Complex Geometries:
- 3D printing can produce complex geometries that are difficult or impossible to achieve with traditional manufacturing processes.
- This capability is particularly beneficial for producing parts with intricate designs.
- Enabling Customization:
- 3D printing allows for high levels of customization, making it ideal for producing custom parts and prototypes tailored to specific requirements.
- Enhancing Flexibility in Material Selection:
- A wide range of materials can be used in 3D printing, from plastics to metals.
- This flexibility allows for the production of prototypes with varying material properties, such as strength, flexibility, and chemical resistance.
What Are the Advantages of Using 3D Printing for Rapid Prototyping?

3D printing for rapid prototyping offers numerous advantages, making it a preferred method in modern manufacturing processes. Here are some of the key benefits:
- Speeds Up Lead Times
Lead times stay low because new custom molds don’t need to be made, and you don’t need to wait for your order to be shipped. For medium-to-small objects, it’s possible to create a new 3D design during the day, let it print overnight, and retrieve your completed object from the printer the next morning. This capability significantly accelerates the prototyping process, allowing you to bring products to market faster.
- Decreases Prototyping Costs
Costs vary greatly depending on part requirements and the materials used. However, creating a part with similar properties using traditional manufacturing methods such as injection molding is almost always more expensive on a per-part basis for small batch or one-off prototypes. 3D printing eliminates the need for expensive tooling, significantly reducing overall prototyping costs.
- Decreases Time to Market
The rapid prototyping process enabled by 3D printing significantly reduces the time required to bring a product to market. Traditional methods involve multiple stages of tooling and machining, which can take weeks or even months. In contrast, 3D printing allows for the creation of rapid prototypes within days.
- Provides Easy to Use Process
One of the significant advantages of 3D printing in rapid prototyping is its user-friendly nature. The process is straightforward and does not require extensive technical knowledge. Computer-aided design (CAD) software is used to create digital models, which are then converted into physical prototypes using a 3D printer. This simplicity allows designers and engineers to focus on innovation without getting bogged down by complicated manufacturing processes.
- Supports Parallel Prototyping
3D printing excels in supporting parallel prototyping, a crucial aspect of the rapid prototyping process. Unlike traditional manufacturing methods, 3D printing does not require tooling modifications between printing runs. This means multiple prototypes can be planned and printed in batches without significant downtime.
- Brings Flexibility to Manufacturers
The ability to make changes and iterate on a custom design is another area where 3D printing excels. To 3D print an object, you first need to create a digital 3D model of it. 3D models can be changed, replicated, and shared in any way you wish. If a series of experiments is unsuccessful, you can simply load up a previous version and try something else. This flexibility is crucial in rapid prototyping.
- Make it Possible to Test and Compare Different Models and Design Ideas
3D printing allows for the simultaneous creation of multiple versions of a prototype, each with slight variations in function or aesthetics. This ability to create multiple iterations and test them in parallel increases the number of designs a company can evaluate. It is a significant advantage over traditional manufacturing methods where changes often require new tooling and extensive setup times.
What are the Most Popular 3D Printing Materials for Rapid Prototyping?
Selecting the right materials is crucial for successful 3D printing for rapid prototyping. Here are the most popular materials and the 3D printing technologies that use them:
- PLA (Polylactic Acid): Widely used in fused deposition modeling (FDM), PLA is known for its ease of use and good visual appearance. It’s ideal for concept models and rapid prototypes.
- ABS (Acrylonitrile Butadiene Styrene): Another common material for FDM, ABS is more durable than PLA and can withstand higher temperatures, making it suitable for functional prototypes.
- Nylon (Polyamide): Used in selective laser sintering (SLS), nylon is strong, flexible, and resistant to wear and impact. It’s excellent for creating functional prototypes and end-use parts.
- Resin: Various types of resin are used in stereolithography (SLA) and digital light processing (DLP) printers. Resins offer high resolution and smooth surface finishes, making them perfect for detailed and intricate designs.
- PETG (Polyethylene Terephthalate Glycol): Used in FDM printing, PETG combines the ease of use of PLA with the durability of ABS. It’s chemical resistant and can be used for both functional and concept models.
- TPU (Thermoplastic Polyurethane): This flexible material is used in FDM and SLS printing. TPU is ideal for creating parts that need to withstand bending and stretching.
- Alumide: A blend of nylon and aluminum powder used in SLS printing, Alumide offers a metallic finish and increased stiffness, making it suitable for both prototypes and functional parts.
How Do Material Properties Impact the Prototyping Process?
Material properties significantly influence the rapid prototyping process and the performance of the prototypes. Here’s an analysis of key material properties and their implications:
- Mechanical Strength: The mechanical strength of a material determines how well a prototype can withstand physical stress. Strong materials like ABS and Nylon are ideal for functional prototypes that need to endure mechanical testing.
- Flexibility: Flexible materials like TPU allow for the creation of prototypes that need to bend or stretch without breaking. This is crucial for parts like gaskets, seals, or wearable devices.
- Temperature Resistance: Materials with high-temperature resistance, such as ABS and certain resins, are suitable for prototypes that will be exposed to heat. This ensures that the prototype maintains its shape and properties under thermal stress.
- Chemical Resistance: Chemical resistance is vital for prototypes that will come into contact with various chemicals during testing or end use. Materials like PETG and certain resins are chosen for their ability to resist corrosion and chemical degradation.
- Dimensional Accuracy: High dimensional accuracy ensures that prototypes meet precise specifications and tolerances, which is critical for parts that need to fit together seamlessly. Materials like resin used in SLA printing provide excellent accuracy.
- Surface Finish: The surface finish of a material affects the prototype’s visual appearance and tactile feel. Smooth finishes are essential for consumer products, while rougher finishes might be acceptable for functional testing.
- Weight: Lightweight materials are preferred for prototypes that will be used in applications where weight is a critical factor, such as aerospace and automotive industries.
What is the Best 3D Printing Material for Prototyping?
The best material for prototyping depends on the specific requirements of your project. Here’s a closer look at the considerations:
- PLA (Polylactic Acid): Best for concept models, visual prototypes
- ABS (Acrylonitrile Butadiene Styrene): Best for functional prototypes, parts requiring durability
- Nylon (Polyamide): Best for functional prototypes, parts with complex geometries
- Resin: Best for detailed and intricate designs, high-resolution prototypes
- PETG (Polyethylene Terephthalate Glycol): Best for functional prototypes, parts requiring durability and flexibility
- TPU (Thermoplastic Polyurethane): Best for prototypes needing elasticity, flexible components
- Alumide: Best for functional prototypes, metallic-looking parts
What are the Applications of 3D Printing for Rapid Prototyping?

3D printing for rapid prototyping offers various applications across multiple industries, providing cost efficiency and flexibility in the product development process. Here are the key applications:
- Concept Validation:
- Use Case: Early-stage product development to validate design concepts.
- Example: Creating a basic model of a new gadget to assess its overall shape and usability.
- Proof-of-Concept Prototype (POC):
- Use Case: Demonstrating the feasibility of a concept.
- Example: Developing a simplified version of a new mechanical part to show potential functionality.
- Visual Prototypes:
- Use Case: Creating models for visual inspection and presentation.
- Example: Fashion designers using visual prototypes to showcase new clothing designs.
- Functional Prototypes:
- Use Case: Testing and validating the functionality of parts and assemblies.
- Example: Automotive engineers producing functional prototypes to test car components under real conditions.
- Engineering/Pre-Production Prototypes:
- Use Case: Creating high-fidelity models to test engineering performance.
- Example: Aerospace companies developing pre-production prototypes to assess aerodynamics and structural integrity.
- Aesthetic and Ergonomic Testing:
- Use Case: Evaluating the look and feel of a product.
- Example: Consumer electronics firms creating prototypes to test the ergonomic comfort of a new device.
- Medical and Dental Prototypes:
- Use Case: Developing models for medical applications and dental fixtures.
- Example: Surgeons using 3D printed anatomical models for surgical planning.
- Architectural Models:
- Use Case: Creating detailed architectural models for planning and presentation.
- Example: Architects using 3D printing to produce scaled-down models of buildings.
- Engineering Verification:
- Use Case: Confirming design specifications and functionality before mass production.
- Example: Engineers producing prototypes to verify the fit and function of mechanical assemblies.
- Educational Models:
- Use Case: Providing hands-on learning tools for educational purposes.
- Example: Schools using 3D printed models to teach students about complex scientific concepts.
- Art and Jewelry:
- Use Case: Creating intricate designs and custom pieces.
- Example: Jewelry designers using 3D printing to produce custom rings and necklaces.
- Robotics:
- Use Case: Developing parts for robotic systems.
- Example: Robotics companies printing custom gears and housings for new robots.
- Custom Tools and Fixtures:
- Use Case: Producing specialized tools and fixtures for manufacturing processes.
- Example: Factories using 3D printing to create custom jigs and fixtures for assembly lines.
- Fashion and Textiles:
- Use Case: Designing and producing unique fashion items and textile patterns.
- Example: Fashion designers using 3D printing to create avant-garde garments and accessories.
How Does Raise3D Improve Rapid Prototyping Across Businesses?
Raise3D printers enhance rapid prototyping by offering efficient, high-quality 3D printing solutions for various businesses. Here are some examples of how different companies leverage Raise3D printers:
Shanghai Genmes Office Products CO., LTD: Established in 1995, Genmes produces a wide range of office supplies. They required a compact, efficient 3D printing solution for their extensive prototyping needs.
The Raise3D N2 printer became an essential part of their R&D. With its accuracy, build volume, and material compatibility, the N2 allowed Genmes to create detailed prototypes quickly.
Benefits:
- Speed: Reduced turnaround times by using an in-house printer, eliminating the three-week wait time previously needed when outsourcing to their parent company.
- Space Utilization: The compact size of the N2 printer fit well in their limited space.
- Verification: Enabled the verification of physical prototypes before final production.
Comosworks Ltd.: Founded in 2021, Comosworks specializes in e-bike sales and parts manufacturing. Traditional CNC machining methods were time-consuming and costly.
The Raise3D Pro3 Plus and E2CF printers allowed Comosworks to produce prototypes and tooling efficiently.
Benefits:
- Efficiency: The Pro3 Plus operates up to 20 hours per day, producing multiple model parts and mass production parts within a week.
- Cost Savings: Eliminated the need for expensive tooling, reducing production costs.
- Build Volume: The large build volume accommodated larger models, reducing the cost and time of production.
Design Considerations Specific in 3D Printing for Rapid Prototyping
When using 3D printing for rapid prototyping, specific design considerations can significantly impact the efficiency and quality of the prototypes produced. These considerations include optimizing designs to minimize costs, reduce print times, and ensure the final product meets the desired specifications. By understanding and applying these design principles, you can make the most of the rapid prototyping process, leveraging the advantages of additive manufacturing.
How to Optimize Designs for 3D Printing in Rapid Prototyping
Optimizing designs for 3D printing involves several practical steps. These steps can help you achieve better results, reduce costs, and enhance the overall efficiency of your prototyping process.
- Avoid Unnecessary Supports: Designing parts that minimize the need for support structures can save material and reduce post-processing time. For example, incorporating angles of less than 45 degrees can help parts self-support during printing.
- Minimize Material Use: Use hollow structures or lattice designs where possible. This not only saves material but also reduces print time. For example, a lattice structure inside a solid model can provide the necessary strength while using less material.
- Consider Part Orientation: The orientation of your part on the print bed affects the print quality and the amount of support needed. Orienting parts to reduce the need for supports can improve surface finish and dimensional accuracy.
- Use Fillets and Chamfers: Sharp corners can lead to stress concentrations and potential failure points in printed parts. Adding fillets and chamfers can distribute stress more evenly and improve part strength.
- Design for Post-Processing: Ensure that your design allows for easy removal of support structures and other post-processing steps. For instance, avoiding deep, narrow channels can simplify cleaning and finishing processes.
- Incorporate Assembly Features: If your design involves multiple parts, include features that facilitate easy assembly. Snap-fit joints, dovetails, and alignment features can help in assembling the final product without additional hardware.
- Optimize Wall Thickness: Ensure that walls are thick enough to provide strength but not so thick that they increase material use and print time unnecessarily. For example, walls of 1-3 mm are typically sufficient for most prototypes.
- Use the Right Material for the Job: Choose materials that match the requirements of your prototype, whether you need high strength, flexibility, or heat resistance. For example, using PLA for simple prototypes or ABS for more durable parts.
- Iterate and Test: Rapid prototyping allows for multiple iterations. Use this to your advantage by testing and refining your designs based on feedback and functional testing.
- Leverage CAD Software Features: Utilize features in computer-aided design (CAD) software to simulate stresses, check for printability, and optimize your design before printing.
What are the Main Challenges and Their Solutions in 3D Printing for Rapid Prototyping?
3D printing for rapid prototyping offers numerous benefits, but it also comes with its own set of challenges. These challenges can impact the efficiency, cost, and quality of the prototypes produced.
Material Issues
Different materials used in 3D printing have unique properties that can affect the outcome of the printed object. Issues such as warping, poor layer adhesion, and material brittleness are common.
Solutions and Troubleshooting Tips
- Warping: Warping occurs when different parts of the print cool at different rates, causing the material to shrink unevenly.
- Solution: Use heated print beds, enclosures to maintain consistent temperatures, and materials with lower shrinkage rates.
- Poor Layer Adhesion: This issue arises when layers do not bond well, leading to weak prints.
- Solution: Adjust the print temperature, ensure the print bed is level, and use materials with good adhesion properties like PLA.
- Material Brittleness: Some materials are brittle and can break easily.
- Solution: Select more durable materials like ABS or PETG, and consider post-processing techniques to strengthen the prints.
Design Inaccuracies
Design inaccuracies can lead to prototypes that do not meet the intended specifications. This can be due to software issues, incorrect design parameters, or printer limitations.
Solutions and Troubleshooting Tips
- Software Issues: Problems with the CAD software can lead to inaccurate designs.
- Solution: Regularly update your software, use reliable CAD tools, and perform thorough design checks.
- Incorrect Design Parameters: Incorrect settings can result in prints that do not match the design.
- Solution: Double-check all design parameters and use calibration tools to ensure accuracy.
- Printer Limitations: Not all 3D printers can achieve the same level of detail.
- Solution: Choose a printer that matches your design requirements and understand its limitations to optimize your designs accordingly.
Machine Limitations
3D printers have physical and technical limitations that can affect the quality and feasibility of prints. Issues like limited build size, print speed, and precision are common.
Solutions and Troubleshooting Tips
- Limited Build Size: Some printers have a small build volume, restricting the size of prototypes.
- Solution: Design parts to be assembled post-printing or use a printer with a larger build volume.
- Print Speed: High-speed printing can lead to lower quality prints due to vibrations and inaccuracies.
- Solution: Optimize print speed settings for a balance between speed and quality.
- Precision: Not all printers offer the same level of precision, impacting the detail of the prototype.
- Solution: Use high-precision printers for detailed parts and ensure the printer is well-maintained.
What Are the Considerations for Choosing a 3D Printer for Rapid Prototyping?

Choosing the right 3D printer for rapid prototyping involves evaluating several key factors to ensure the technology meets your specific needs. These considerations impact the quality, speed, and cost-efficiency of your prototyping process.
Technology Type
3D printing technology plays a critical role in determining the best fit for your prototyping needs. Different technologies offer various benefits and limitations.
Fused Filament Fabrication (FFF)
FFF is most suitable for creating quick, low-cost prototypes and basic proof-of-concept models. It is ideal for initial design validation and fit testing.
Pros:
- Cost-Effective: FFF printers are generally more affordable than other types.
- Material Versatility: Can print with various thermoplastics such as PLA, ABS, and PETG.
- Ease of Use: User-friendly and widely available, making it accessible for many users.
Cons:
- Lower Resolution: Compared to SLA and SLS, FFF offers lower resolution and surface finish.
- Strength Limitations: Parts produced may not be as strong or durable as those made with SLS or SLA.
- Print Speed: Slower print speeds for complex or large models.
Applications:
- Basic Prototypes: Useful for creating simple models to test design concepts.
- Fit Testing: Ideal for checking the fit of parts before committing to more expensive manufacturing processes.
- Educational Models: Frequently used in educational settings for demonstrating 3D printing technology.
Stereolithography (SLA)
SLA is perfect for prototypes that need high detail and smooth surface finishes. It’s used for visual models and parts requiring fine features.
Pros:
- High Resolution: Provides excellent detail and surface finish.
- Aesthetic Quality: Produces visually appealing prototypes with smooth surfaces.
- Material Options: Can print with a variety of resins, including flexible and high-temperature materials.
Cons:
- Fragility: Parts can be more brittle compared to those made with SLS.
- Post-Processing: Requires cleaning and curing post-print.
- Material Cost: Resins can be expensive.
Applications:
- Visual Prototypes: Ideal for creating display models and detailed prototypes.
- Aesthetic Testing: Used to assess visual and ergonomic aspects of designs.
- Medical Models: Commonly used for creating detailed anatomical models.
Selective Laser Sintering (SLS)
SLS is ideal for creating functional prototypes with complex geometries and high mechanical strength. It is widely used for producing parts that need to withstand rigorous testing and functional validation.
Pros:
- High Strength: Produces durable and robust parts suitable for functional testing.
- Complex Geometries: Can create intricate designs without the need for support structures.
- Material Variety: Supports a wide range of thermoplastics, including nylon and composites.
Cons:
- Cost: Generally more expensive than FFF and SLA due to material and machine costs.
- Post-Processing: Requires cleaning and sometimes additional finishing steps.
- Surface Finish: Parts often have a rough surface that may need smoothing.
Applications:
- Functional Prototypes: Excellent for testing mechanical properties and functionality.
- Complex Parts: Suitable for parts with intricate details and internal structures.
- End-Use Parts: Can be used for low-volume production of final parts.
Digital Light Processing (DLP)
DLP is best for producing high-resolution parts with fine details. It is commonly used for applications where precision and surface finish are critical, such as dental and jewelry models.
Pros:
- High Resolution: Capable of producing very detailed parts with smooth surfaces.
- Speed: Typically faster than SLA, making it suitable for time-sensitive projects.
- Material Options: Wide range of photopolymers available for various applications.
Cons:
- Brittleness: Parts can be more brittle compared to those made with SLS.
- Limited Build Size: Generally smaller build volumes compared to other technologies.
- Post-Processing: Requires curing and sometimes additional finishing.
Applications:
- Detailed Prototypes: Ideal for prototypes that require high detail and accuracy.
- Medical Models: Commonly used for dental and anatomical models.
- Jewelry: Perfect for creating intricate jewelry designs.
Multi Jet Fusion (MJF)
MJF is ideal for producing functional prototypes with excellent mechanical properties and high detail. It is best used for creating parts that need to be both durable and finely detailed.
Pros:
- High Strength and Detail: Produces parts with excellent mechanical properties and fine details.
- Speed: Faster than many other 3D printing technologies, making it suitable for rapid iterations.
- No Support Structures Needed: This reduces post-processing time and material waste.
- Smooth Surface Finish: Often produces parts with a better surface finish compared to other technologies like FFF.
Cons:
- Material Limitations: Primarily works with nylon, which might not be suitable for all applications.
- Cost: Initial setup and material costs can be higher compared to FFF.
- Complexity: The process can be more complex, requiring more specialized knowledge to operate effectively.
Applications:
- Functional Prototypes: Ideal for testing parts that need to withstand mechanical stress.
- Complex Geometries: Suitable for parts with intricate designs that do not require support structures.
- Small Batch Production: Can be used for producing small batches of end-use parts.
Continuous Liquid Interface Production (CLIP)
CLIP is best for creating high-resolution prototypes quickly. It excels in applications requiring smooth surface finishes and fine details.
Pros:
- High Resolution and Smooth Finish: Produces parts with very fine details and smooth surfaces.
- Speed: Faster than traditional SLA and DLP, making it ideal for rapid prototyping.
- Material Versatility: Supports a variety of photopolymers, including flexible and rigid materials.
- Scalability: Efficient for both prototyping and small-scale production.
Cons:
- Material Costs: Photopolymers can be expensive compared to other 3D printing materials.
- Post-Processing: Requires post-curing to achieve optimal material properties.
- Brittleness: Parts can be more brittle compared to those produced with SLS or MJF.
Applications:
- High-Detail Prototypes: Ideal for prototypes that require high detail and aesthetic quality.
- Medical Models: Commonly used for dental and anatomical models.
- Consumer Products: Suitable for producing prototypes of consumer goods where appearance is crucial.
Sheet Lamination 3D Printing
Sheet lamination is ideal for creating large, laminated objects quickly and at a low cost. It’s suitable for applications where the aesthetic finish is not a priority, and where metal parts are required.
Pros:
- Speed: Produces parts faster than many other 3D printing methods.
- Cost-Effective: Lower material costs compared to powder-based or liquid-based processes.
- Material Versatility: Can work with a variety of materials, including metals and composites.
- Large Parts: Capable of producing larger parts efficiently.
Cons:
- Surface Finish: Typically rougher than other 3D printing technologies, requiring additional post-processing for a smooth finish.
- Detail Resolution: Lower resolution compared to technologies like SLA or SLS.
- Layer Bonding: Bonding layers can sometimes be weaker, affecting the overall strength of the part.
Applications:
- Large Parts: Ideal for producing large parts quickly and cost-effectively.
- Metal Parts: Suitable for creating metal parts for industrial applications.
- Prototyping: Good for early-stage prototypes where speed and cost are more critical than finish quality.
How to Choose Which Technique is Right for You?
Choosing the right 3D printing technique depends on various aspects, such as the complexity of the design, material requirements, desired finish, and budget constraints. Different techniques offer unique benefits and drawbacks, making them suitable for specific applications.
So when making a choice, ensure you do proper research, so you don’t end up using the wrong technique for your application.
How Can You Utilize 3D Printing in Your Rapid Prototyping Process?
Integrating 3D printing into your rapid prototyping process can significantly enhance the efficiency and quality of your product development. There are two primary options to consider: outsourcing to 3D printing services or investing in an in-house 3D printer. Each option has its unique advantages and drawbacks, which we’ll explore to help you make an informed decision.
Outsource to 3D Printing Services
Outsourcing involves hiring external 3D printing services to handle the prototyping process. These services have expertise in various 3D printing technologies and can produce high-quality prototypes based on your designs. You simply send your CAD files, and the service provider takes care of the rest, from printing to post-processing.
Pros:
- Cost Efficiency: Avoid the high initial cost of purchasing and maintaining a 3D printer. Outsourcing can be more affordable, especially for low-volume or occasional needs.
- Access to Advanced Technologies: Outsourcing allows you to benefit from the latest 3D printing technologies without having to invest in expensive equipment. This includes technologies like selective laser sintering (SLS), stereolithography (SLA), and more.
- Expertise and Quality: Service providers often have experienced technicians who can ensure high-quality prints and troubleshoot any issues that arise during the printing process.
- Flexibility: Easily switch between different printing technologies and materials based on the specific needs of each project. This flexibility can be particularly beneficial for creating multiple iterations of a prototype.
Cons:
- Lead Times: Depending on the service provider and the complexity of your project, lead times can vary. This might slow down your prototyping cycle compared to having an in-house printer.
- Less Control: You have less control over the printing process, which can be a disadvantage if you need rapid adjustments or immediate changes to your prototypes.
- Shipping Costs: Additional costs for shipping prototypes to and from the service provider can add up, particularly for large or heavy items.
Buy a 3D Printer
Buying a 3D printer means investing in a machine that can handle your prototyping tasks internally. This approach requires an upfront investment in the equipment and ongoing costs for materials and maintenance. However, it provides immediate access to rapid prototyping without the need to rely on external services.
Pros:
- Control and Flexibility: Having a 3D printer in-house allows you to control the entire prototyping process. You can make quick adjustments to designs, create multiple iterations, and test functional prototypes without waiting for external services.
- Cost Efficiency for Frequent Use: For businesses with high prototyping needs, owning a 3D printer can be more cost-effective in the long run. You avoid the recurring costs associated with outsourcing.
- Faster Turnaround Times: With an in-house 3D printer, you can significantly reduce lead times. This speed is crucial for iterative processes and getting your product to market faster.
- Confidentiality: Keeping the prototyping process internal helps maintain the confidentiality of your designs and intellectual property.
Cons:
- Initial Investment: The upfront cost of purchasing a 3D printer can be significant, especially for high-end models. Additionally, you need to consider the ongoing costs of materials, maintenance, and potential repairs.
- Learning Curve: Operating a 3D printer and achieving high-quality prints requires a certain level of expertise. You may need to invest time in training your staff or hiring skilled technicians.
- Maintenance and Downtime: Managing the maintenance and repair of your 3D printer can lead to downtime, which may interrupt your prototyping cycle. It’s essential to account for these potential delays.
Conclusion
The rapid prototyping with 3D printing is here to stay, and it’s important in helping businesses design, test, and modify products at will.
Note that rapid prototyping and 3D printing are two different terms, as 3D printing is a type of manufacturing process used in prototyping. By incorporating the additive manufacturing process into your prototyping method, you can create complex geometries with high dimensional accuracy, reduce costs, and achieve quicker market validation.
We hope the information in this article offers you the high-end solution you need to improve your rapid prototype processes.
Frequently Asked Questions
1. Is 3D printing the same as rapid prototyping?
3D printing is a technique used in rapid prototyping. Rapid prototyping encompasses various methods, including 3D printing, to create functional prototypes quickly and efficiently, enabling iterative design and testing.